

Exterior Walls - Cold Climates

This method is best for primarily cold climates.
In colder climates people are looking to help keep a room warm; if the room has a cathedral ceiling, chances are it is losing heat through that ceiling. The best way to combat against this is to use a combination of regular insulation and a radiant barrier, like AtticFoil™.
Remember, when the goal is heat retention, placing the foil closest to the inside of the home will yield the best case results. Again, you MUST have an air gap on at least one side of the foil, regardless of the type of insulation you are using. This means you either need to have the air gap before you add the foil to the walls OR after the foil is installed, create the air gap before you finish the walls.
Typically your layers will go as follows, from the roof down: Roof deck, traditional insulation, radiant barrier foil insulation, air gap (created with wood battens or foam strips), and finally, sheetrock/drywall.
TIP
This method is the same layers as the Cathedral Ceiling Method for cold climates, except the airspace will be “dead air” instead of ventilated.
It will not damage the wall to have this area unvented.
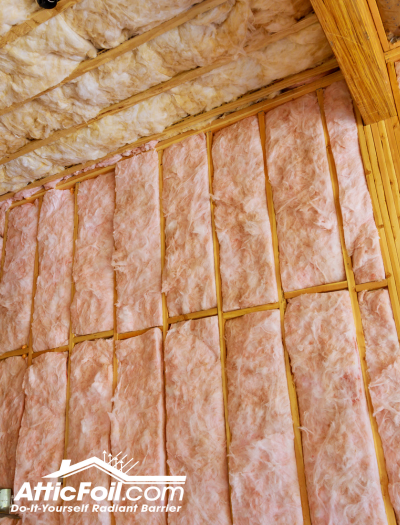
Step 1: Adding Traditional Insulation (R-Value)
First fill the cavities with your insulation. Use standard batt insulation, blown-in insulation, rigid foam board, or spray foam.
If the space is not going to be conditioned, then you can skip adding r-value since r-value isn't as beneficial in a non-conditioned space.
Typically an R-13 to R-19 will fit in a stud cavity on the walls, but you can fur it out to deepen the cavities if needed. Either way, go ahead and add your insulation right up against the exterior sheathing and make sure it's snug and fills the cavity well.
Note: fiberglass by itself does not stop air movement.
Keep in mind that if you install insulation uniformly, you’ll get much better performance from it. You want full cavities but remember you will need to be adding an air gap before the final interior finish is added, so make room for that.

TIP
In cold climates, you want your radiant barrier to be closest to the interior of the space, where the heat is coming from. This way you can reflect it back inside the room first, and the r-value behind it will slow down the conductive heat loss.
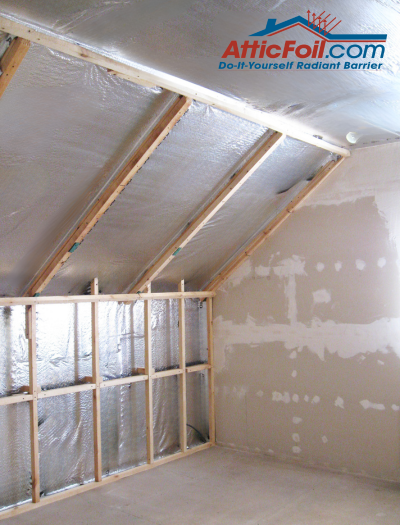
Step 2: Adding the Radiant Barrier Foil
Now add AtticFoil® over the insulation.
It doesn’t matter if you install the foil horizontally or vertically, it will work the same either way.
For vertical installs, try the 26″ wide AtticFoil™ for trusses that are 24″ OC.
Now you have the following layers in the assembly: (coming from the outside in) exterior sheathing, R-value insulation, and the radiant barrier foil.
Use foil tape and tape the seams where the foil is overlapped, so you have a secure and seamed foil layer. Once you finish sealing the seams, you’re ready to create the air gap to the inside.
Optionally some customers frame a new wall inside after the foil goes up, to create the air gap and support the interior finish.
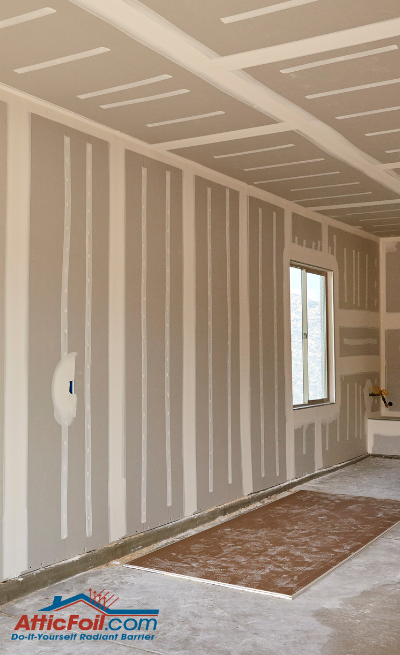
Step 3: Creating the Required Air Gap
All radiant barriers require an air gap to block radiant heat, no matter what side the heat is coming from.
In cold climates the heat source comes from inside the room, so we want the air gap between the room's interior and the foil surface.
The simple way to do this is to take wooden battens (1×2 sized works well) and attach them horizontally across the rafter bays. The air gap required is a 1/2" minimum. You can create a bigger air gap, but the foil only needs the minimum to work.
This process will secure the foil to the assembly, but more importantly, it will create an air gap where radiant heat can exist so you can reflect it back into the room/space. This process will make the room more comfortable in colder months, holding heat in better than before.
Once you have all the battens/furring strips in place, you will finish the assembly by installing the drywall over the battens.
Can you just forego the strips? No, the air gap is required. If you choose to just layer everything on top of the foil surface without creating air gaps, the radiant barrier effect will be lost. All radiant barrier products require an air gap to block radiant heat transfer.
For Added Performance of the Wall
For an extra air-tight wall, we recommend two additional materials: adding a layer of foam board and using caulk between the foam board and the drywall.
You can use ½” or ¾” foam board OVER the studs, on the furring strips, directly behind the sheetrock. You will install the foam board like sheetrock and then install the sheetrock using longer drywall screws so you can make it through the foam layer too.
Adding the foam board to the assembly does several things:
- adds R-value
- helps air seal the wall
- reduces thermal bypass
- sound/noise reduction
Finish this optional upgrade by adding a bead of caulk on the face of the studs before the foam layer (or before the sheetrock layer). Be sure to caulk between the bottom plate of the wall to either the concrete slab or the subfloor to reduce air leakage under the wall as well.
You will be amazed at how little heat will get through a wall built using this method.
For similar installation instructions, see Installing Radiant Barrier in a Cathedral Ceiling to Hold the Heat In.
Using Radiant Barrier in a Non-Conditioned Space
If you have a non conditioned space (meaning you are not heating and cooling the space), and you are finishing with drywall, you do not have to add traditional insulation.
In this case, the installation becomes very simple.
Just cut a sheet of radiant barrier to the proper length of the area you are working on. This is just like the typical Staple Up Install method.
Run the foil across the rafters horizontally and secure the foil to the rafters with 3 to 4 staples per rafter. Continue this pattern until you have covered the entire assembly from bottom to top, making sure each run of foil overlaps the previous run by at least 2 inches.
Once the wall is completely covered with the foil, simply attach the drywall/sheet rock/ceiling over the foil. Yes, directly on top of the foil. What about the air gap? Well, it's behind the foil - the empty cavity that you didn't fill with insulation is the air gap, so you're good to go.
Note: this method will work in both hot or cold climates, when you have a non-conditioned space.