Introducing the BlueTex™ 2mm Garage Door Kit, the perfect solution for cooling down a residential garage door, especially when the door catches direct sun. Easy to install, this kit is designed to reduce heat and control basic condensation on metal garage doors. Installation allows for the door to continue moving on the track with no issues.
BlueTex™ 2mm Pro foil surface can reflect up to 97% of radiant heat and the glossy bright white interior finish brightens up your garages.
Enjoy the improved garage temperature and added comfort with the BlueTex™ Residential Panel Garage Door Kit.

The BlueTex™ Residential Garage Door Insulation Kit
If your garage door is catching direct sunlight, then you definitely stand to gain from adding a radiant barrier inside the garage on the door (and any other walls that are catching direct sunlight from the exterior).
Keep in mind that a garage is typically not conditioned (being heated or cooled) so the results are more about tempering the heat gain in the summer. To really maximize results in your garage, you want to address & insulate all surfaces catching direct sunlight, staring with the garage doors.
BlueTex™ garage door insulation kits are designed for panel-style garage doors with panels that are no taller than 21" from center to center. Typically these doors are made in 4-panel rows or 5-panel rows.
Each panel style garage door insulation kit includes:
- 22" wide BlueTex™ 2mm Pro insulation rolls
- 180' long roll of 3M® double-sided tape (to attach the insulation to the metal panels)
- 196' long roll of 2" wide white seam tape )to seal the edges of the insulation onto the door)
- screws/washers (option if you want to screw the insulation into the door)

FYI
Panel style doors roll up on tracks and have individual panels instead of one singular sheet of metal like a roll up garage door.
Step 1: Prep the door & add a row of double-sided tape
- Begin by ensuring the door is clean and dry. Use water and a rag to remove any dust or dirt; chemicals are not necessary. If there is any old residue on the door, remove that as well.
- With the door closed, start at the bottom. Apply 3M® double-sided tape along the seam where the panels meet, covering the entire width of the door. It's okay if the tape crosses the seam between the two panels. Cover evenly, but do not remove the paper backing yet. Attach one sticky side to the door panel, pressing firmly along the bottom lip and hinge.
- Apply double-sided tape to the vertical sides of each panel along the bottom row as well. Leave the liner on for now, only attaching one side of the tape to the door.
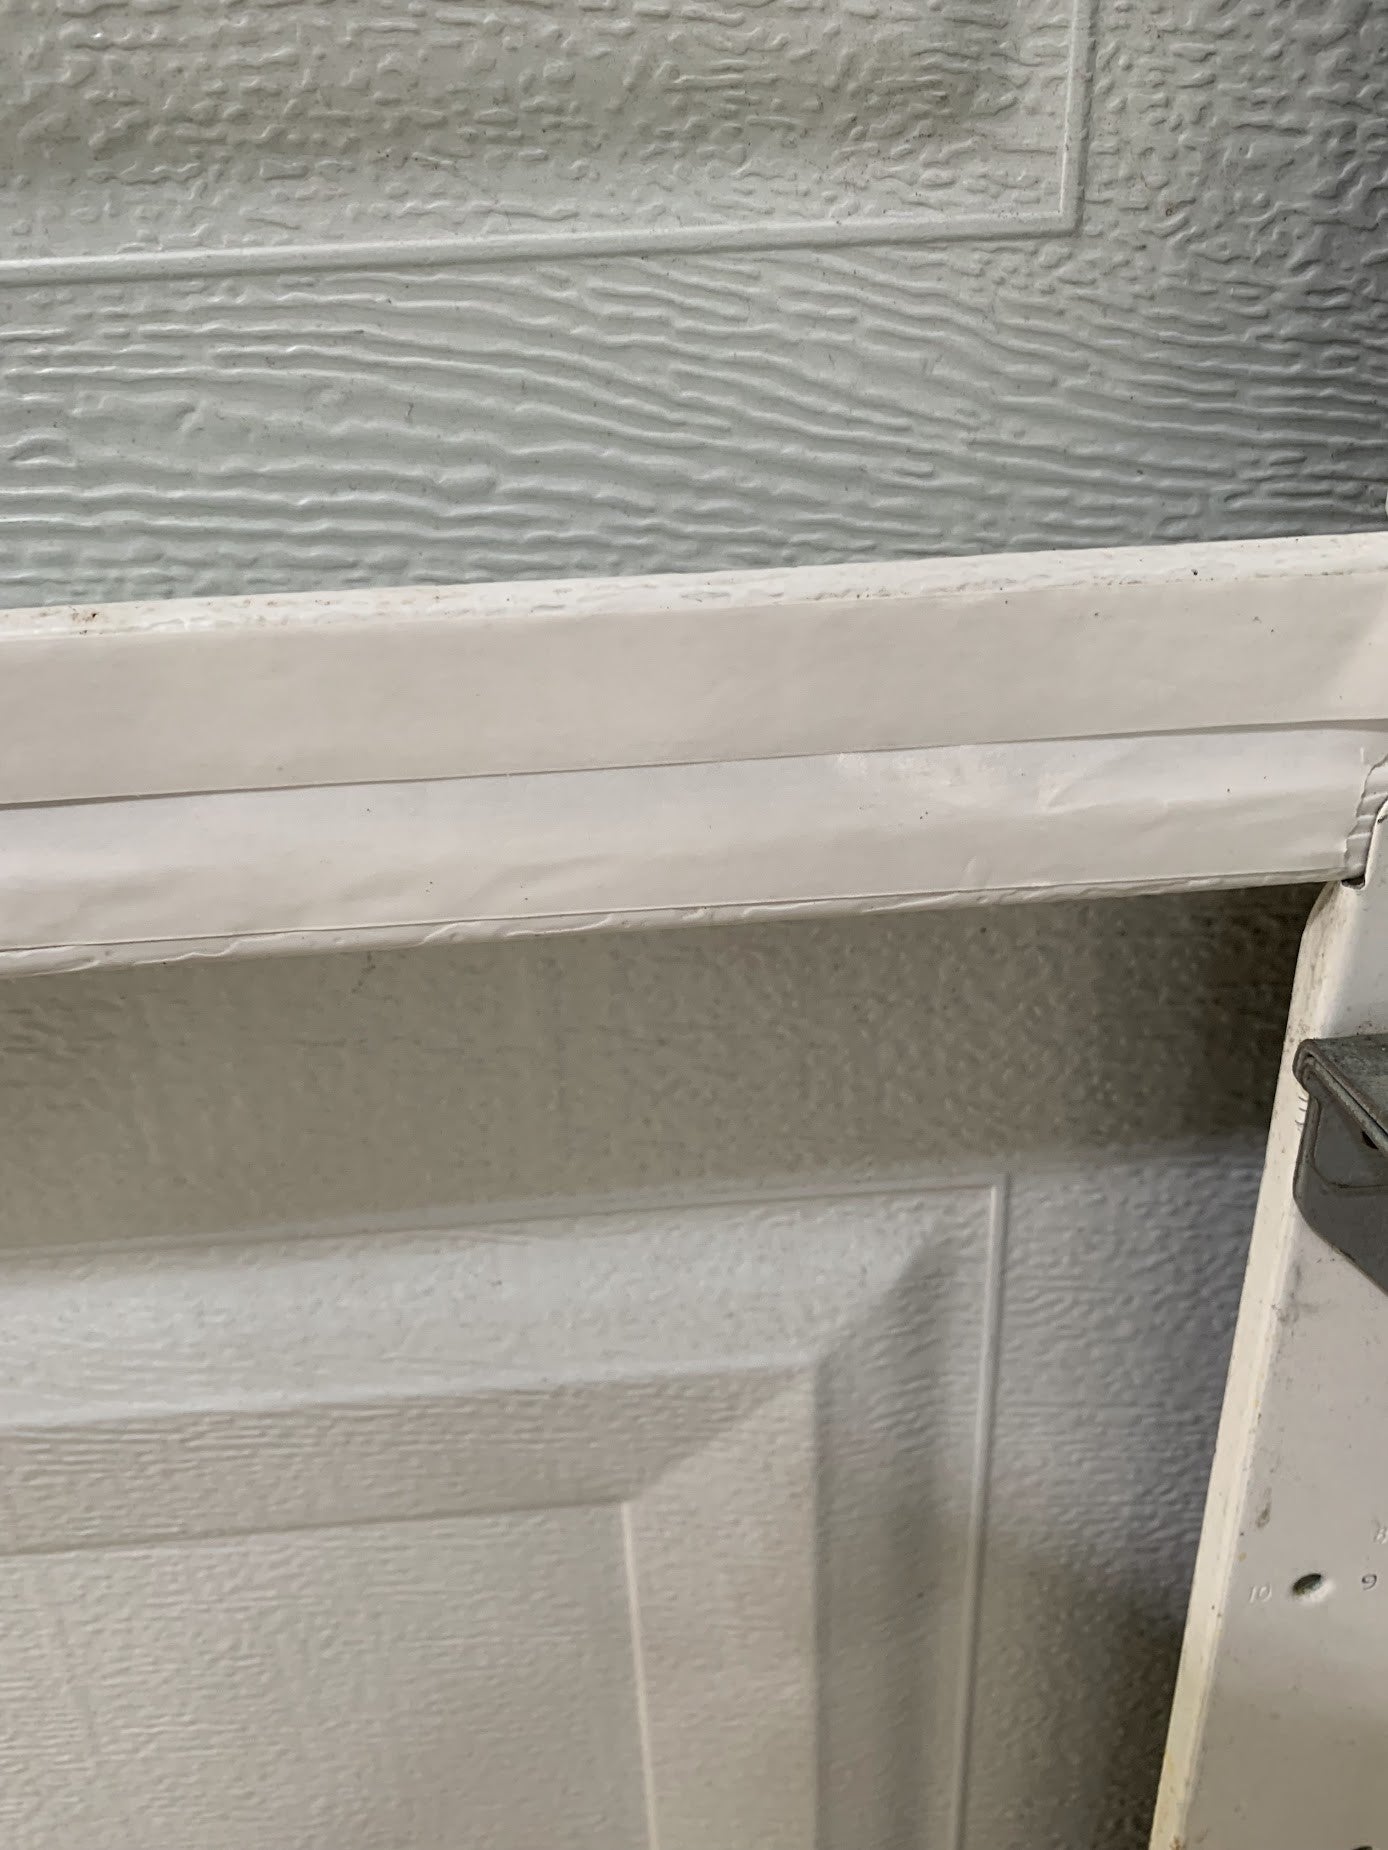
Step 2: Start along the top edge of the bottom row of panels on the door
- Start with the bottom panel and measure a piece of BlueTex™ that is 2" to 3" wider than the door. Cut it off the roll and set it aside.
- Use a knife to cut the seam on the double-sided tape between the panels. Remove the paper liner from the bottom panel only (this will run along the top of the lower panel).
- Open the door about 12" to 18", just enough to open up the seam between the bottom panel and the next one.
- Hold the pre-cut piece of BlueTex™ level and press the top edge to the double-sided tape, keeping it level. Cut a small slit where the hinges are and place the BlueTex™ across the entire panel, pressing firmly on the tape edge.
- When finished, you should have a piece of BlueTex™ covering the full width of the door, similar to a mudflap (the bottom edge is not yet secured to the door).
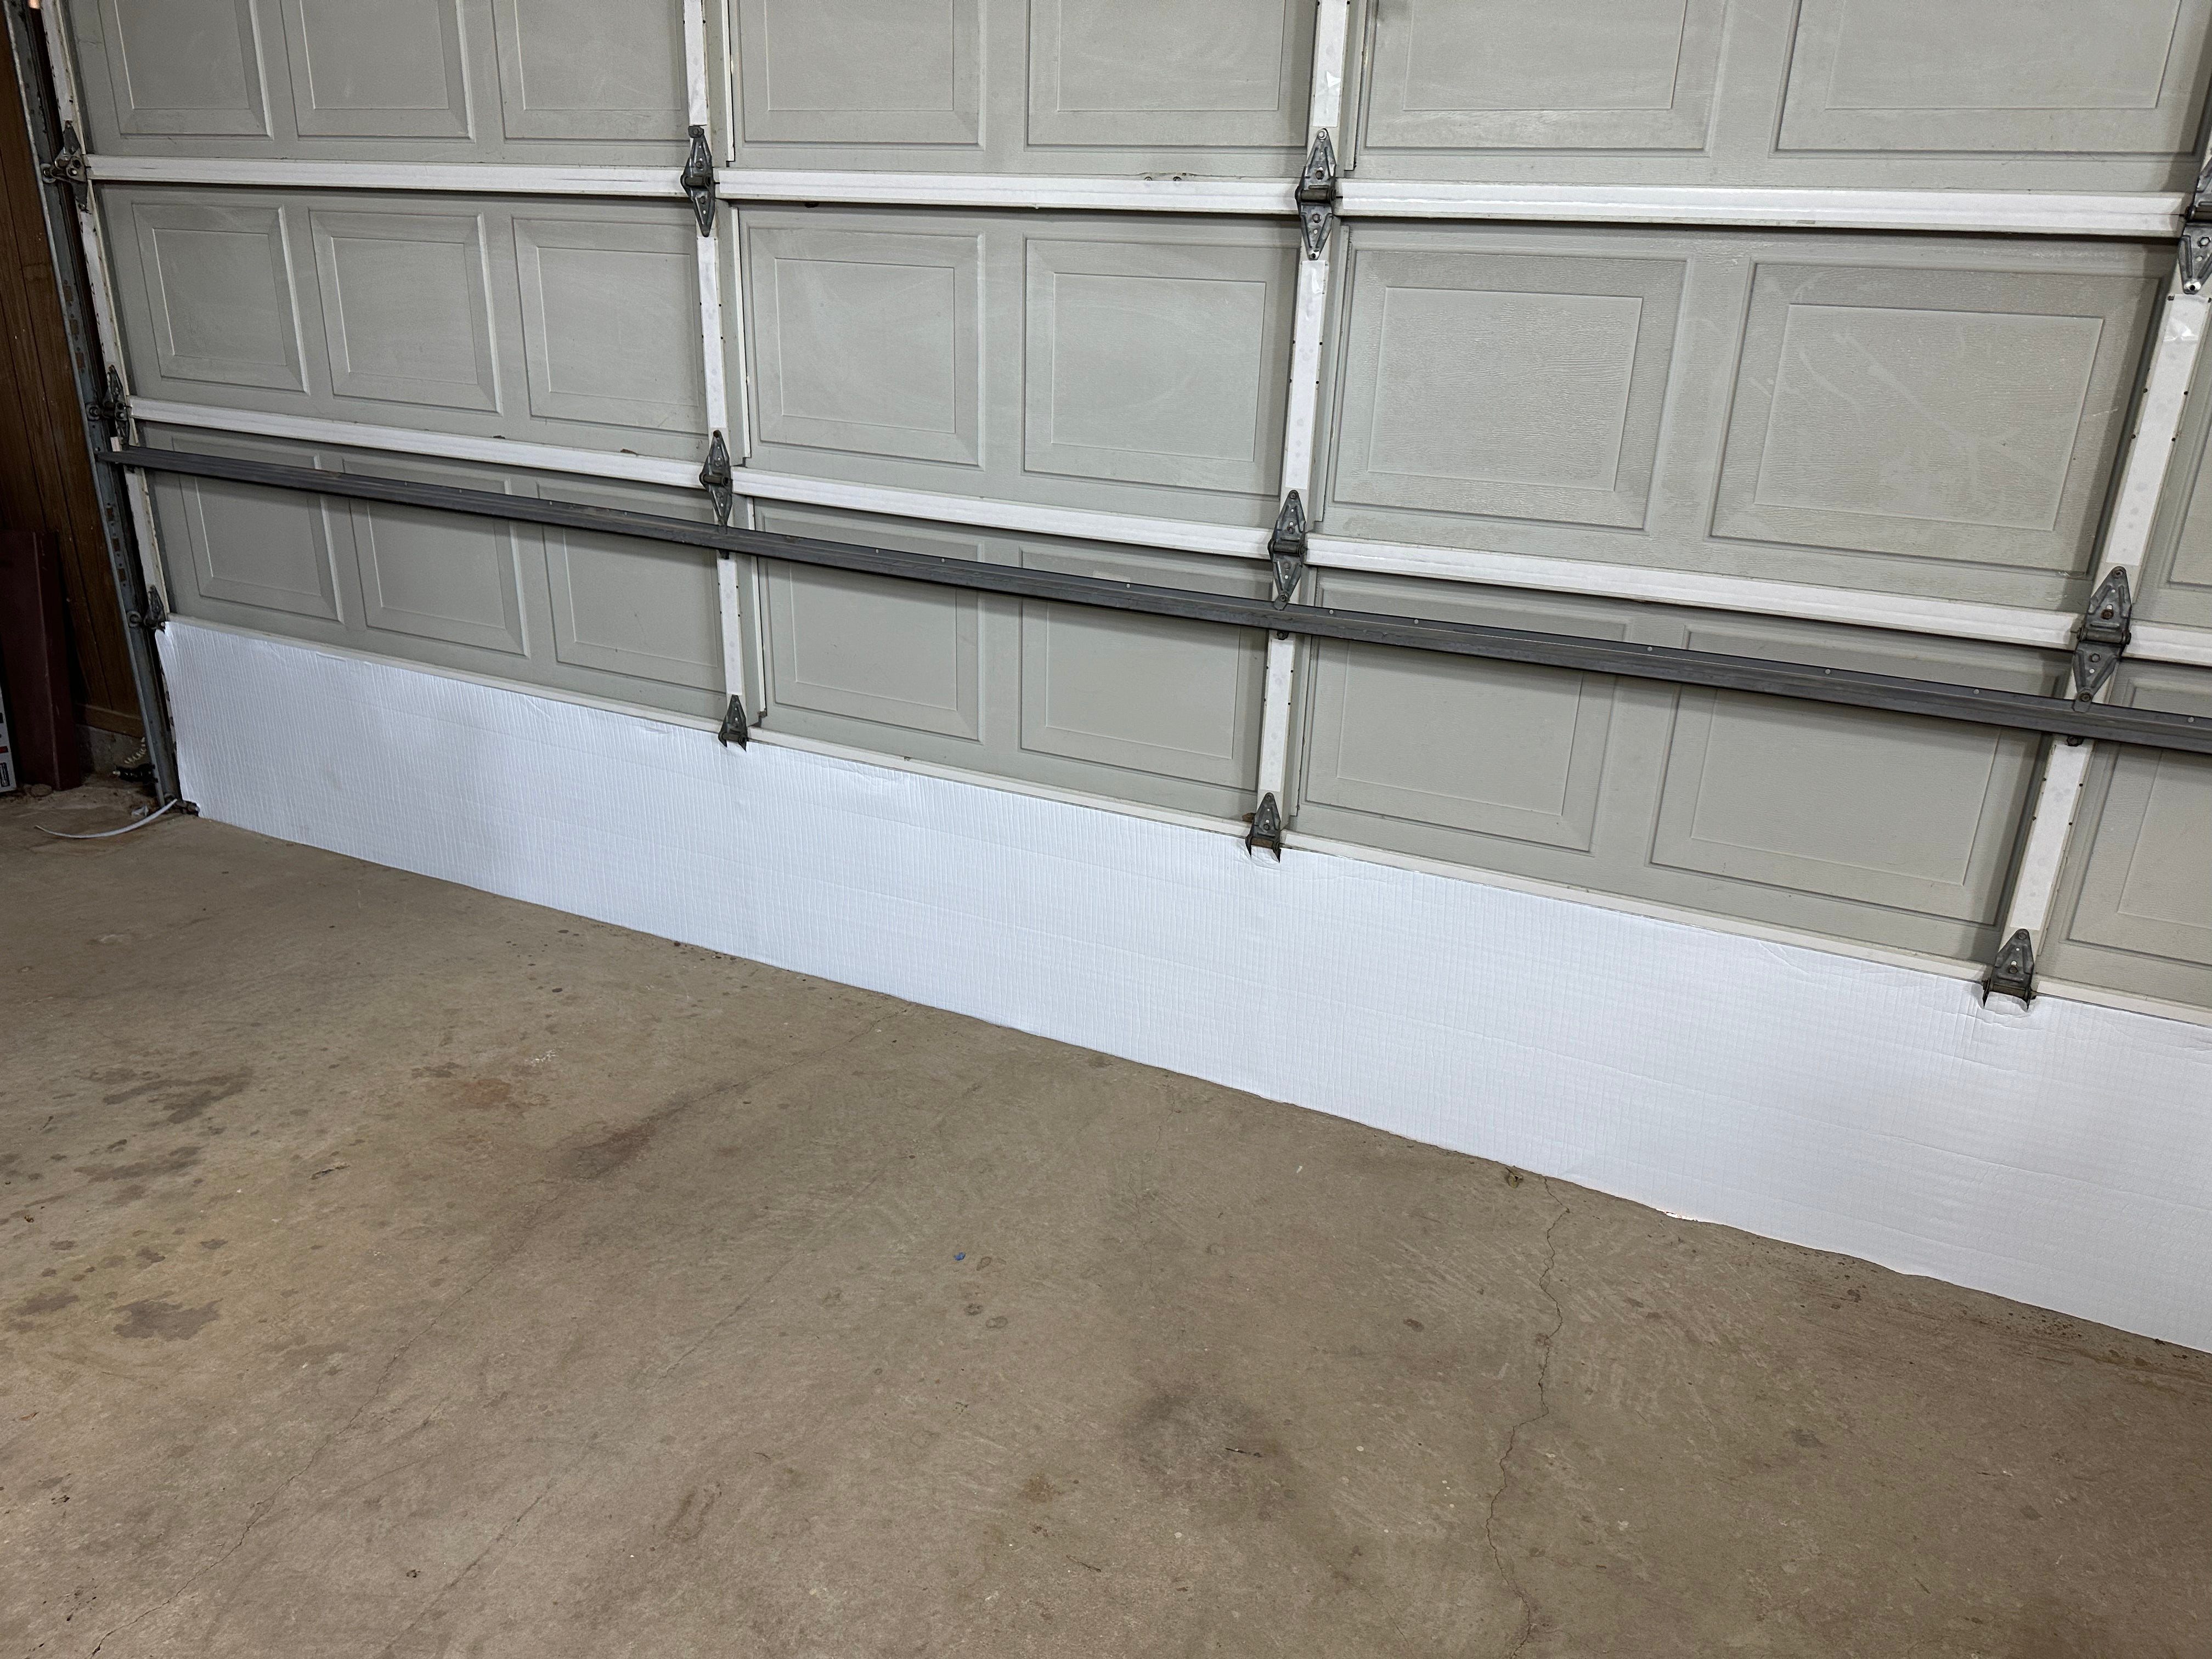
Step 3: Secure the bottom edge across the bottom row of the door
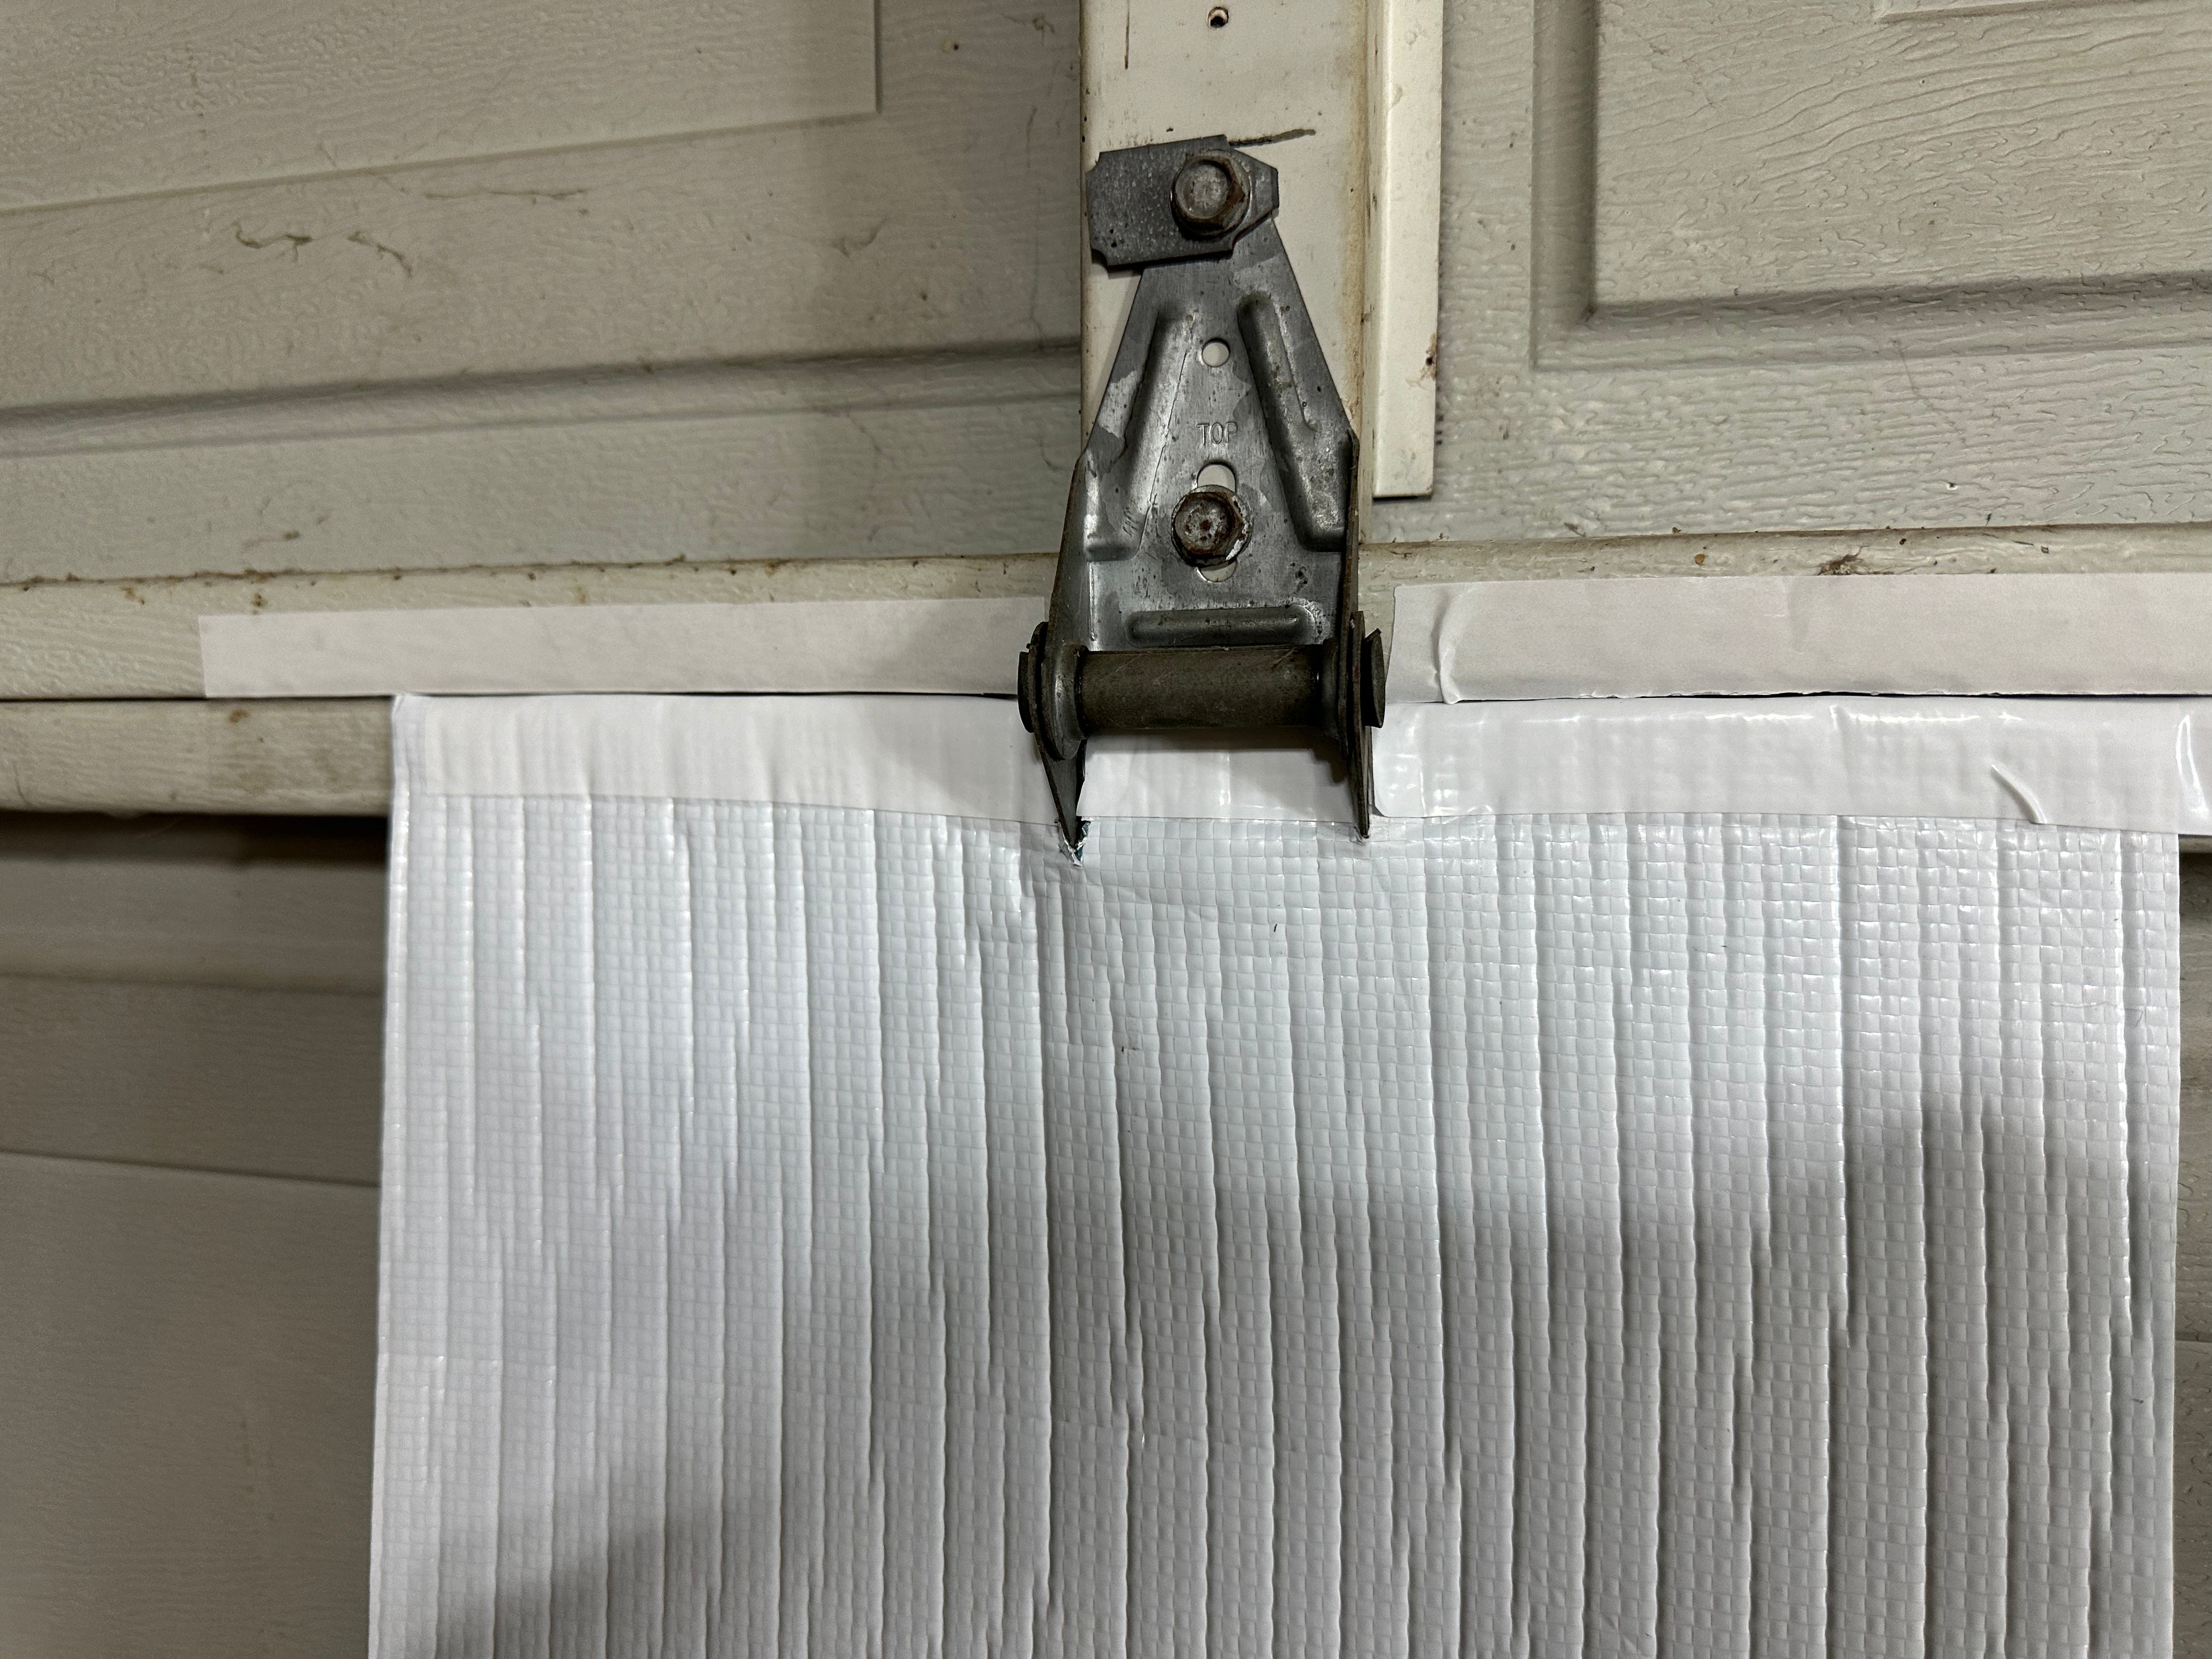
- Have one person lift the panel of BlueTex™ while you remove the paper liner from the bottom strip of double-sided tape. Be careful not to let the foil side stick to the tape before you’re ready, as it’s very sticky and difficult to reposition once attached.
- Press the BlueTex™ onto the bottom strip of tape and the vertical sides of the panels, moving from one side to the other, and remove the paper from the double-sided tape as you go. Press firmly onto the tape.
- The bottom of the door should still be off the ground, and the BlueTex™ should be firmly attached to the bottom panel. Use a sharp knife to trim the BlueTex™ so that it is flush with the bottom of the metal door.
- Close the door and do not open it again until all the panels are installed in the later steps.
Step 4: Prep to Install the Second Row
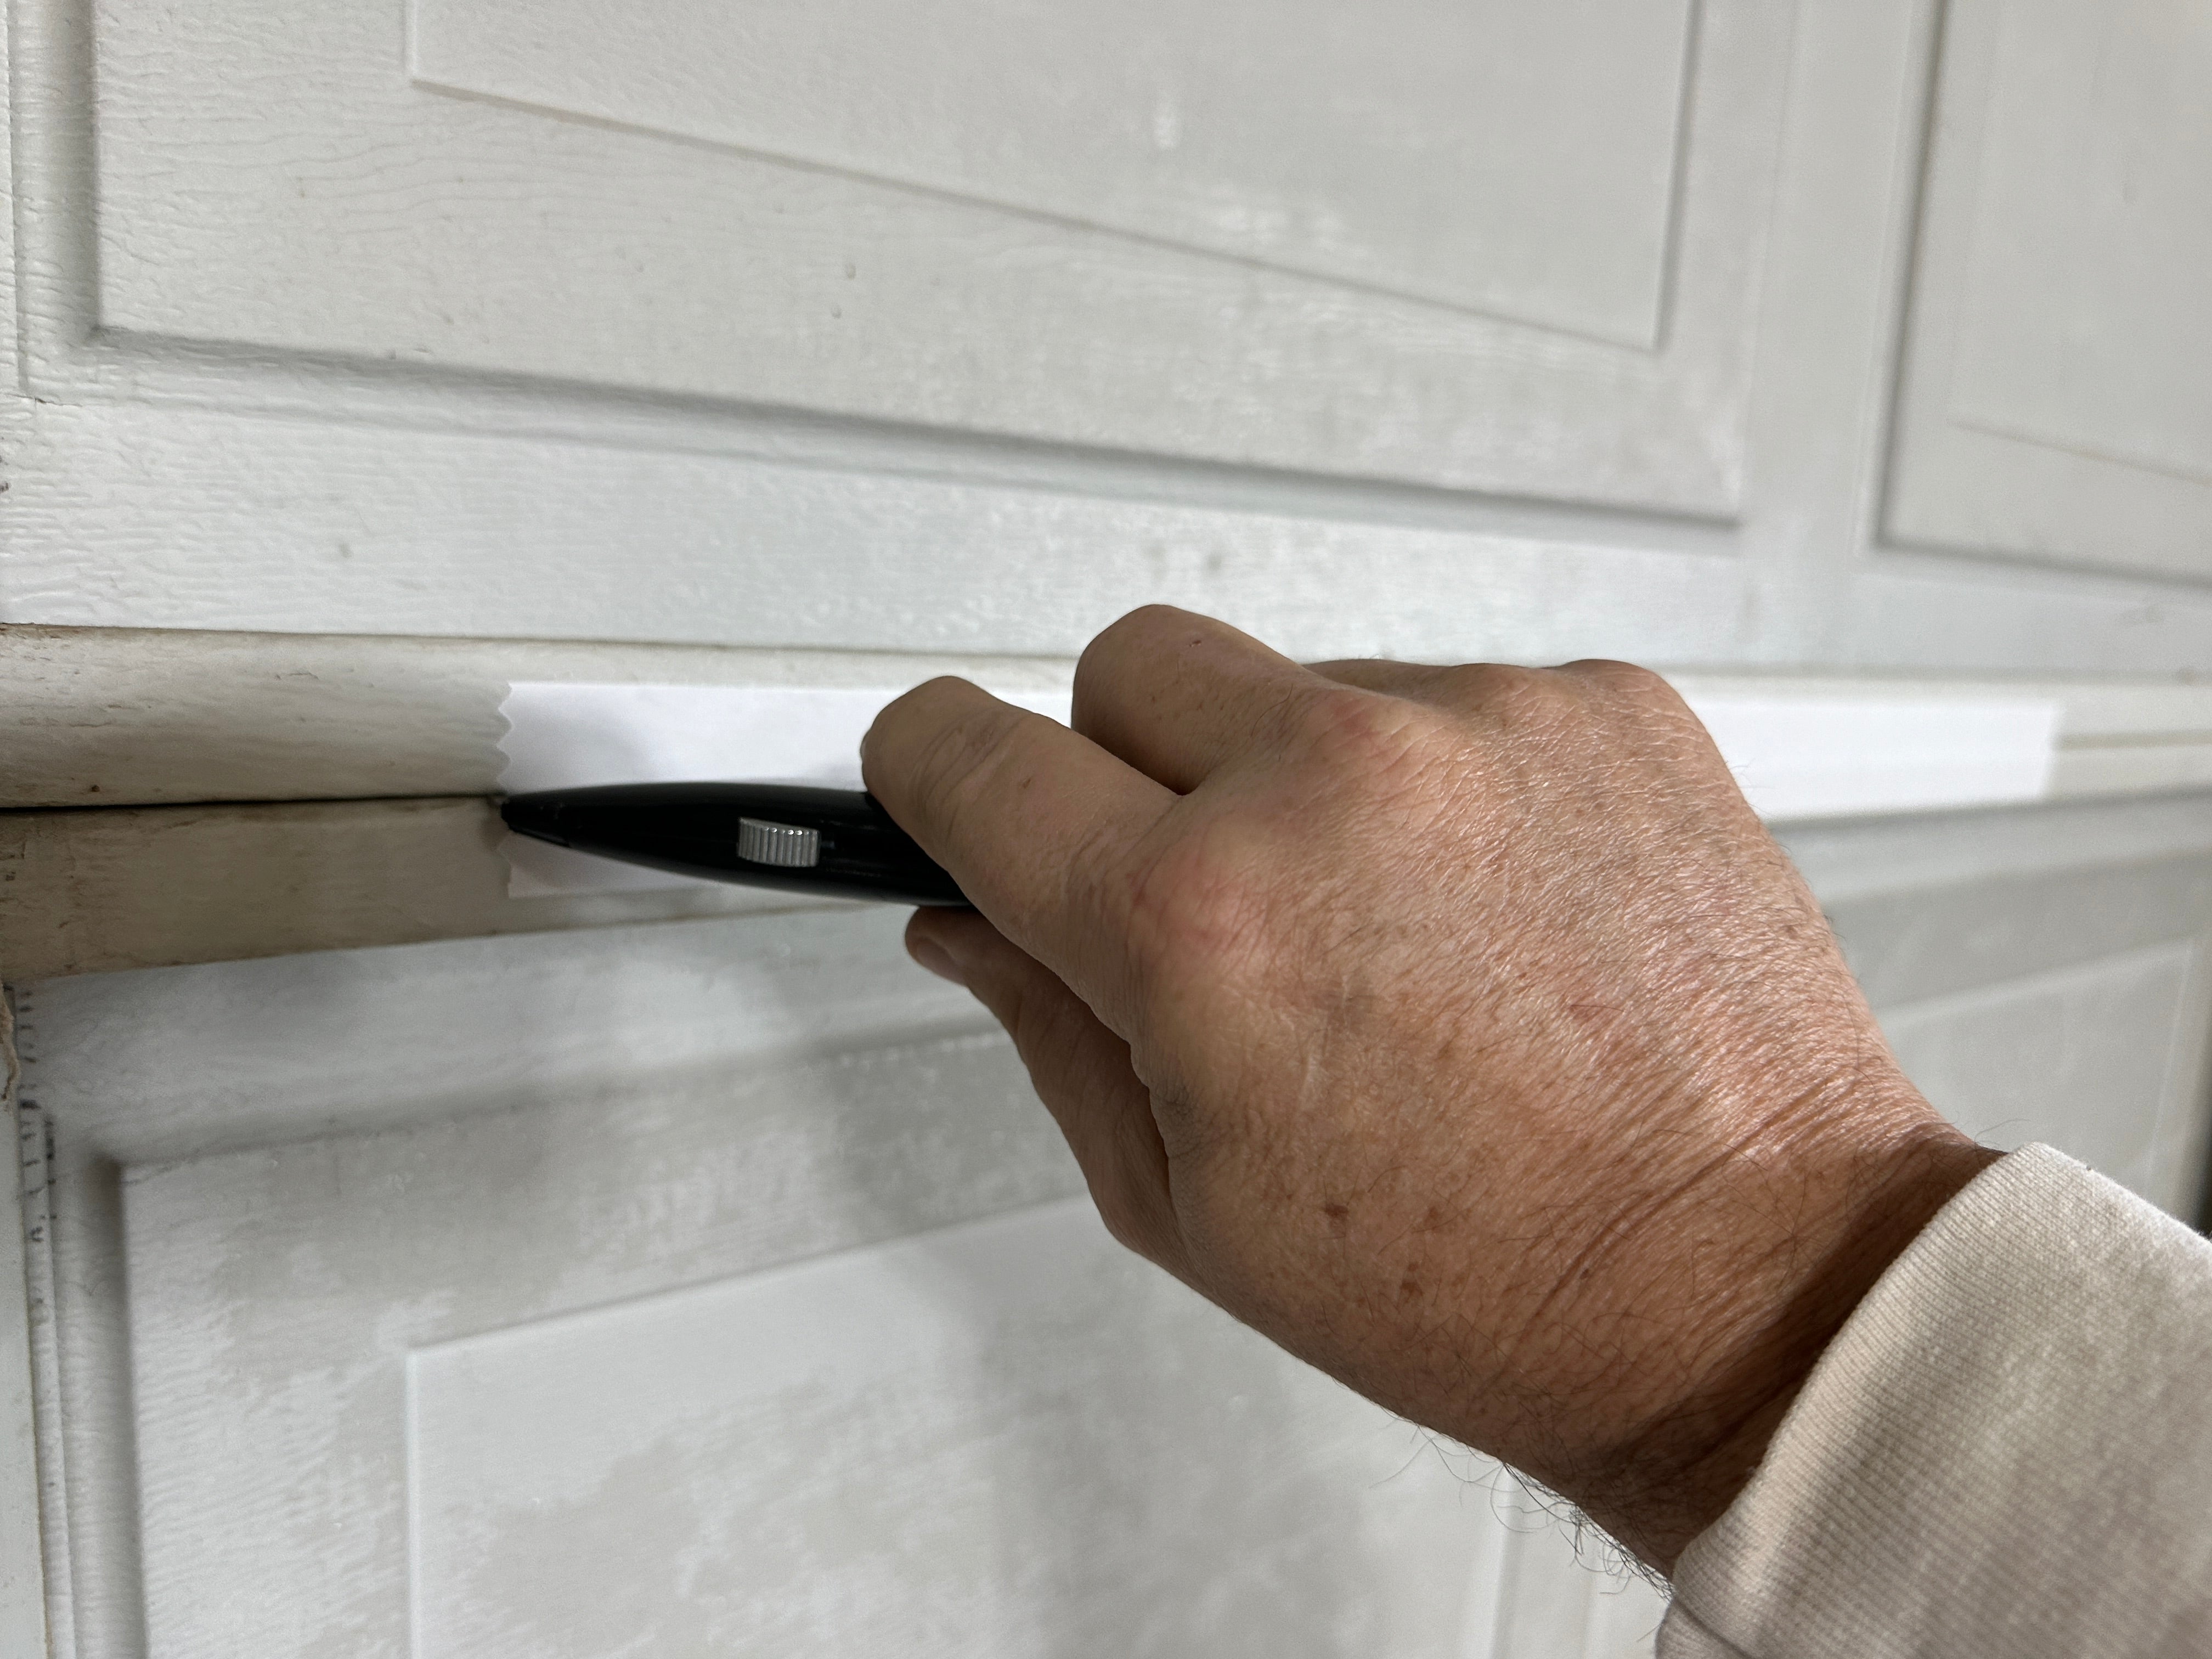
- Measure a piece of BlueTex™ that is 2" to 3" wider than the door, cut it off the roll, and set it aside.
- Install double-sided tape along the hinge, covering the full width of the door. You can now go ahead and apply tape to the rest of the door, covering the hinges and vertical bracing.
**Important:** Do not open the door once the double-sided tape is applied! - Install the second row across the panels just as you did the first one: first, slice the double-sided tape at the seams, then align the top edge and attach the BlueTex™ to the tape, allowing the bottom flap to hang down until the entire top flap is secured.
Step 5: Move to the next row of panels up from the bottom of the door
Return to the bottom of the second row and secure it just like the row above, except this time there will be an overlap.
The bottom of the BlueTex™ should extend a couple of inches past the double-sided tape. This is okay and will be trimmed later. Continue installing the BlueTex™ on the panels until the entire door is covered. Don't worry about the seams as you go; we will address those in the next step.
Step 6: Open seams and add tape to finish
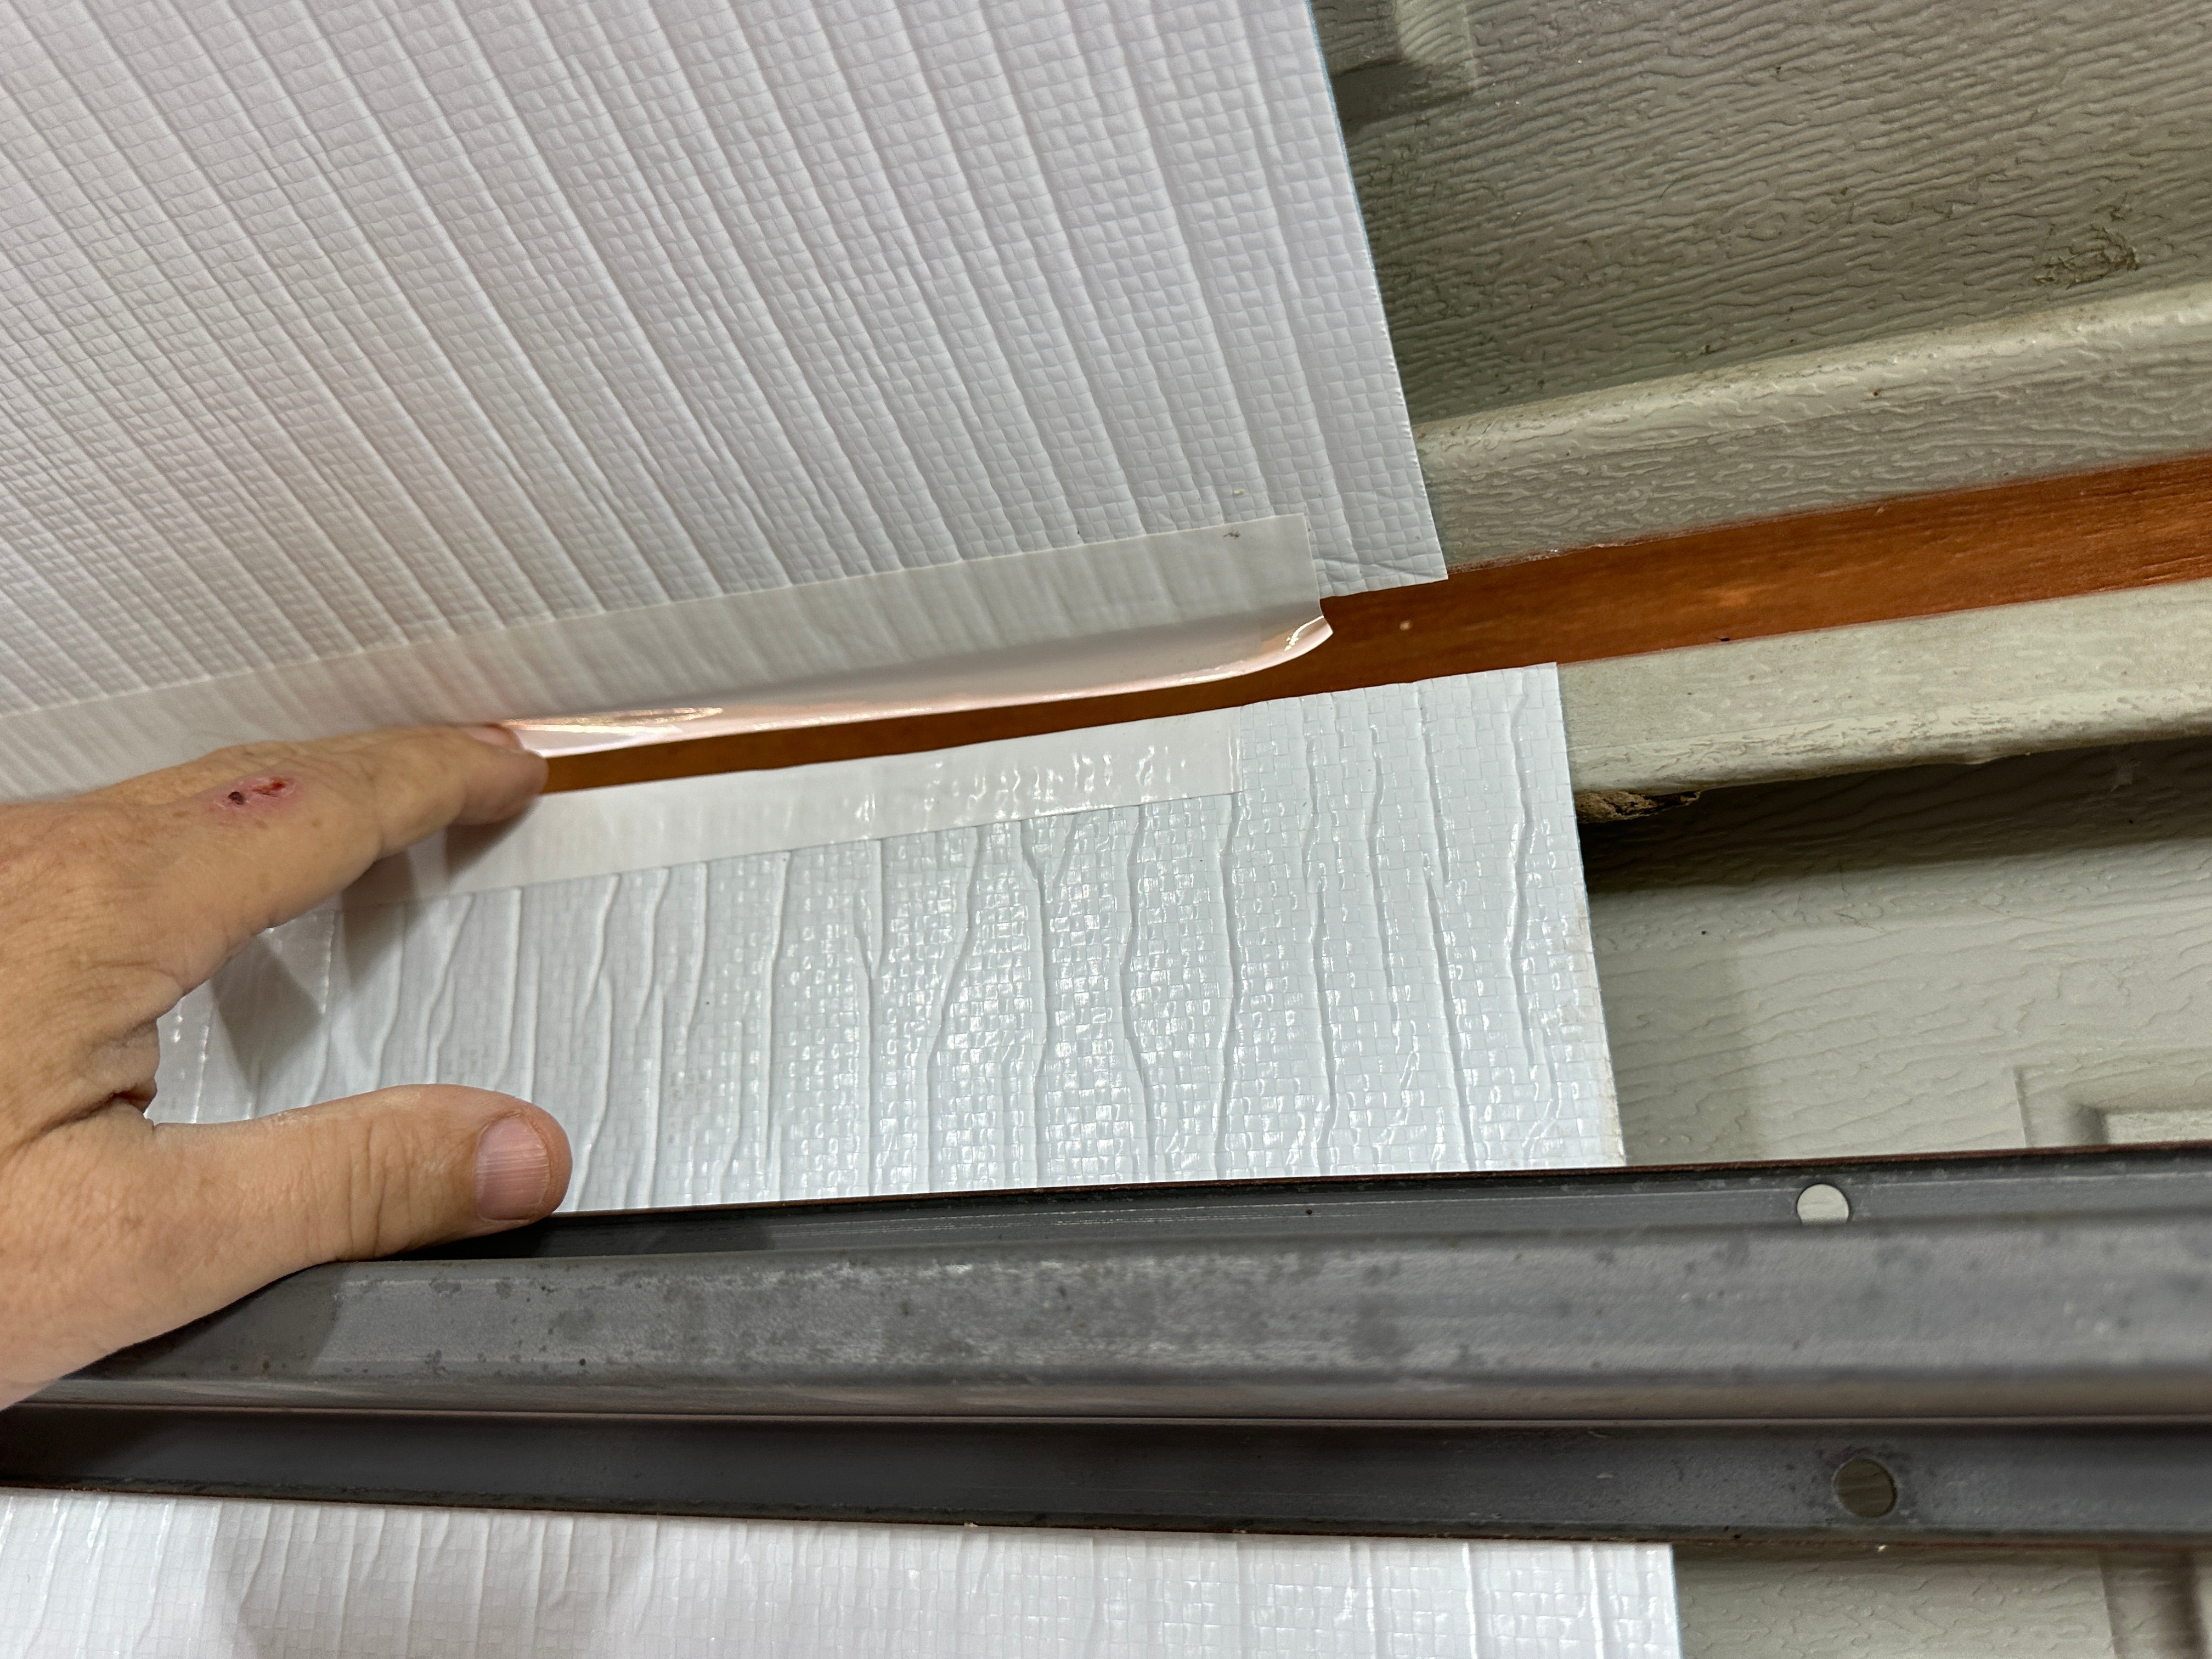
- Use a knife to cut through both layers of BlueTex™ and the double-sided tape on each hinge across the entire door.
- Open the door in sections, stopping when the panel you're working on is accessible.
- Use our 2" or 3" white tape to seal the top, bottom, and sides of each panel, ensuring half of the tape adheres to the BlueTex™ and the other half to the metal door.
- Continue this process until all panels are taped along all edges.


